Well, it’s not really the daily bread anymore, but for a number of years before Thing 2 was born, I made our bread. We seem to eat a lot of bread around here with toast and sandwiches being a daily occurrence, so I would make a double batch of four loaves about every 10 days. I loved making our bread and have to say, I had the recipe and method down to a science.
Then I got pregnant with Thing 2. Ugh. Let’s just say we started buying bread. I fell out of love with making bread. I felt just too icky and exhausted. No more daily loaf, English muffins, pitas, artisanal boules, or wild-yeast sourdoughs. It was a dark time.
Now that Thing 2 is a happy toddler, I am trying to get back into the habit. My family misses eating our bread and I miss making it (and eating it). So to help me fall in love with making bread again, I would like to share with you my recipe and method for making our daily bread, a honey-oat loaf.
These are all the things I use to make our double batch of daily bread. I have streamlined this recipe as much as possible to minimize the time it takes and reduce the clean-up time. The only thing missing from the photo is my Kitchen Aid mixer. You can, of course, make this recipe with other tools, and knead by hand and use measuring cups rather than a scale, I’m just showing you how I do it.
The Recipe:
Well, now that’s clear isn’t it. I will write the recipe out at the end of the post, but I wanted to show you what my recipe looks like. I think this recipe started from a Best Recipe Cookbook. Since I am intrigued by artisinal breadmaking, I converted the original recipe amounts to weights and baker’s percentages and then I tweaked it lot from there. If you would like to learn more about the fascinating and liberating method of bakers percentages, check out The Fresh Loaf in my blogroll. No, really, it’s cool, and invaluable for designing and troubleshooting recipes, but I warn you it involves some math. But it’s really cool! Check it out.
Ok. Now that’s out of the way, let’s go!
Making a Double Batch of Honey Oat Bread
Part 1: Making the Dough
Since my Kitchen Aid mixer can’t handle mixing a double batch (4 loaves) of bread dough, I make two single batches (2 loaves each), and then combine them after the mixer step into one large batch.
First, I measure 320 gm milk into a glass cup.
Then I tare (zero) the scale and add 235 gm of water.
Then I repeat that in a second measuring cup, put them both in the microwave and heat them until they are warm (about 3 minutes in my microwave).
While the liquid is heating, I measure out 710 gm of flour and then add 114 gm of oats. I use old-fashioned oats.
By now the liquid is warm to the touch, I estimate about 100-110 degrees, and I add it to the dry ingredients and stir it just to combine using my white scraper. I set the first bowl aside and repeat the process with the second bowl.
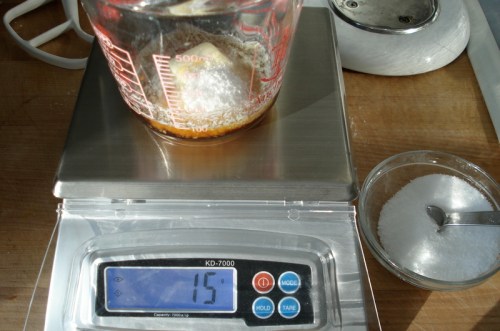
Then I rinse out the measuring cups and throw in 1.5T butter (I use salted), and measure out 65-70 gm honey (I buy the cheapest I can find for this and save the good stuff for on top of the bread) and 15 gm salt (I use kosher).
I put the measuring cups back in the microwave and nuke about 45 seconds to melt the butter.
I add the honey-butter-salt to the dough and then add the yeast. I use a scant tablespoon of yeast.
Then I put it in the mixer, mix it around a bit, change to the dough hook and knead for 5 minutes. It transforms from this:
To this:
To finally this!
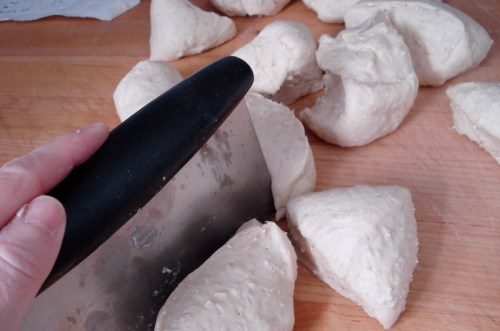
I do the same additions and mixing and kneading to the second batch of dough. While the second batch is kneading, I use my bench scraper to cut the first batch into pieces.
Then when the second batch is done, I cut that into pieces too. Then I combine all the pieces with a quick knead and the two batches of dough are combined into one large batch.
I put it into my dough bucket, and set it someplace warm-ish to rise. It usually takes about 90 minutes to double in size.
A couple of notes here. I don’t grease my dough bucket, I find with a little gentle coaxing the dough will release and slide out just fine. I also am not very particular about finding a warm space for it to rise. Long, cool rises are supposed to improve flavor, and if it isn’t doubled when I think it should be, I just let it have more time. If I need the dough to be doubled in an hour, I’ll find (or make) a warm place to try and hurry it along.
This first part usually takes me 30 minutes. This morning, taking pictures of everything, it took me about 45 minutes. In that time I also fed Thing 2, fed the cat, ran to the basement for more flour, changed the battery in my thermometer (still not working), and answered a bunch of questions about why is mommy taking pictures of her dough.
Part 2: Shaping and the Second Rise
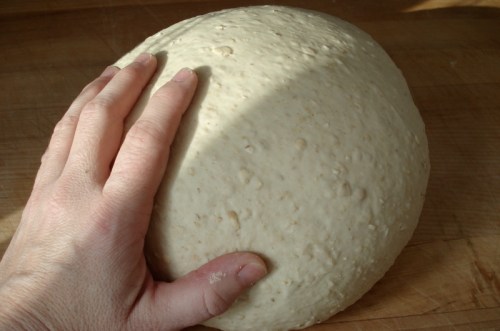
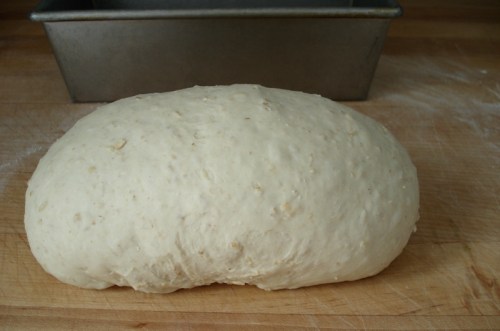
Whoa. I got so caught up in writing the first part of this post, I didn’t check the dough. Behold! It had risen!
I use my flexible scraper to nudge and coax the dough onto a very lightly floured counter.
I give it a few quick kneads to deflate it a bit and re-distribute the yeast for the second rise.
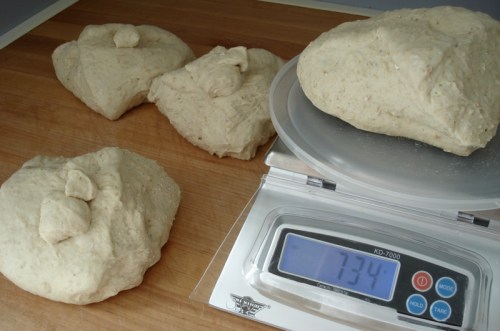
I divide the dough as evenly as I can into quarters using my bench scraper. Then I weigh each quarter, add some here, take some away there so that each piece is about 730 gm. I weigh it on the lid of the dough bucket because I don’t like doing extra dishes.
I knead each weighed piece a couple of times to combine in any scraps, lightly dust the counter with flour and begin shaping each loaf. First, I pat it into a vague rectangle shape. Then, starting on the edge facing away from me, I roll it onto itself, and pinch the seam shut.
I keep doing this until a log has formed, making sure to pinch each seam shut. Then I karate chop the ends to pinch them. My goal is to not tear the surface of the dough while doing this. This is called the “gluten cloak”. I think it is more important when making baguettes and other classic shapes. You can see here there is a tear on the side and it looks a little shaggy. No worries!
I turn the karate-chopped ends under, pinch them to seal, and it is ready for the pan. I spray my loaf pans with cooking spray before putting in the bread.
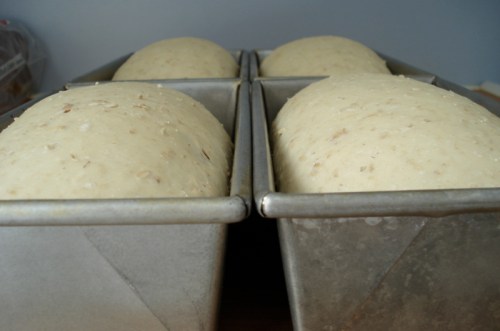
I shape the remaining dough the same way and set the pans some place warm-ish to rise. I let them rise until the top of the dough is about 1/2″ above the side of the pan. This usually takes about an hour. I don’t cover the dough while rising, I don’t find it necessary. This second step of shaping the loaves only takes about 10 minutes.
Part 3: Baking
Yay! They rose. I still get excited when my bread rises. Let’s measure, shall we? I’m a geek.
Ready for the oven!
I preheated the oven to 350 degrees sometime during the second rise. I don’t bake the loaves on a baking stone or add steam or anything. Just place them on the rack in your dirty oven. You can also use a clean oven, but I am unfamiliar with this, and am not sure how they would fare.
Wow! Look at that oven spring! Quick, close the door!
Bake for about 40 minutes. The bread should be golden brown, sound hollow when thumped, and if your thermometer is working, have an internal temperature of between 190 and 200 degrees.
Turn them immediately out of their pans onto a cooling rack. Make sure they are fully cool before slicing. Whatever you do, don’t eat a slice of warm bread with butter and honey! The bread experts will tell you proper cooling is critical for bread quality. If you can resist, you are a stronger person than I.
The Recipe:
Honey Oat Daily Loaf (makes 2 loaves)
710 gm white flour (about 5 2/3 c)
114 gm Old Fashioned Rolled Oats (about 1 c)
320 gm Milk (about 1 1/3 c)
235 gm Water (scant 1 c)
1.5 T Butter (salted)
70 gm honey (about 3T)
15 gm salt (kosher, about 2 3/4 tsp)
Scant T active dry yeast (or 1 foil pkg)
Combine milk and water and heat in microwave until warm to the touch (around 110 degrees). Combine flour, oats and mix in water and milk. Combine honey, salt and butter in microwave safe container and microwave until butter is nearly melted. Add to dough. Add yeast. Mix to combine and then knead 5 minutes in Kitchen Aid mixer on level 2 (or knead by hand 8-10 minutes until smooth). Place dough in container, cover and let rise until doubled, about 45 minutes. Remove dough, lightly knead and divide into 2 even pieces. Shape into loaf, and place, seam side down into a greased loaf pan. Let rise in a warm space until crown of dough is about 1/2″ about pan (about 1 hour). While bread is rising, preheat oven to 350 degrees. Place bread in oven and bake about 40 minutes until done. Remove from oven and immediately turn out onto cooling rack.













mmm…bread…
Yum! Looks great, but the best picture is of Thing 2 at oven’s door!
mmm…bread is right Kate. It is a good batch. Pop over and have some!
I think so too Molly. It looks like she was watching for the bread, but she was actually just pressing her face against the warm oven door. She had two pieces when it came out though!
Yum…I can only imagine the luscious smell! Can you mail me some?
When you visit Roz, we’ll have some! Thanks for the comment…I know you can be shy!
The second I saw the pastry knife (not even sure if that is the proper name) & the SCALE, I realized how it would just be much easier if you made me some!! I still remember you chastising me when I did not use a sifter to mix my dry ingredients!! I’m so glad you FINALLY started a blog…..it was either this or write a book (which I promise to still nag you about!). I’m so proud, and a little verklempt….talk amongst yourselves…..
Thanks Katie. And I apologize for being insufferable. Even I don’t sift anymore!
Pingback: My Take: Sirloin Saloon Bread | :: Had The Radish ::